Is your Fisher F-Pulse Pinpointer not working properly? Try this repair!
How to disassemble and fix the Fisher F-Pulse / similar procedure for the Tek-Point Probe
Metal detecting enthusiasts understand the excitement of uncovering buried treasures, and the Fisher F-Pulse Pinpointer has been a reliable companion in this task at least for me. However, like any electronic device, pinpointer malfunctions can occur. If you find yourself with a Fisher F-Pulse Pinpointer that’s refusing to cooperate, keep reading! In this article, we’ll guide you through a step-by-step process on how to disassemble and hopefully fix the Fisher F-Pulse, a procedure that can be applied mostly similarly to the Tek-Point Pinpointer.
Disclaimer: Working with electrical components can be dangerous and I do not take responsibility for any damage caused.
Diagnosing the Problem
I have had the Fisher F-Pulse pinpointer for some time now, and after having not used it for a while I tried inserting fresh batteries and powering it up but to my great disappointment: no result! I checked the batteries with a multimeter, and they seemed fine, so the problem wasn’t there. I tried looking into the battery compartment but didn’t see anything out of the ordinary there either, so the next logical step was to take the pinpointer apart and inspect the inner components.
PS: When I think back to the last couple of times that I used the pinpointer I remember having some issues with it cutting off at random times and sporadically not behaving, so maybe the issue was there before I put the pinpointer for storage.
Tools Needed
As a preparation for the disassembly, the following tools will be necessary:
- Small Phillips Head and a flathead screwdriver (like the ones used for small electronics)
- Philips Head “PH0” bit or screwdriver
- Larger flat-head screwdriver (or a coin) for opening the battery lid
- Multimeter (optional but useful for troubleshooting)
Step-by-Step Repair Process
Prepare Your Workspace
Start by finding a clean, well-lit workspace where you can lay out the pinpointer and its components. Ensure you have enough space to organize the screws and small parts you’ll be dealing with during the disassembly.
Remove the Battery Cap
The first step will obviously be to remove the battery lid. It is always important to remove the power supply before disassembling and repairing electronics. Use the flathead screwdriver (or a coin) to remove the battery cap. If you have this pinpointer you’re probably acquainted with this procedure. Once the cap is off, take out the batteries and inspect them and the battery compartment for any visible issues.
Disassemble the Pinpointer
First off, you’ll have to remove the speaker cap to access the disassembly screws. This can be achieved by carefully using a small flathead screwdriver to pry open the cover. Start by prying a little from all sides and work your way around. Be careful! These covers are brittle and are known for easily breaking.
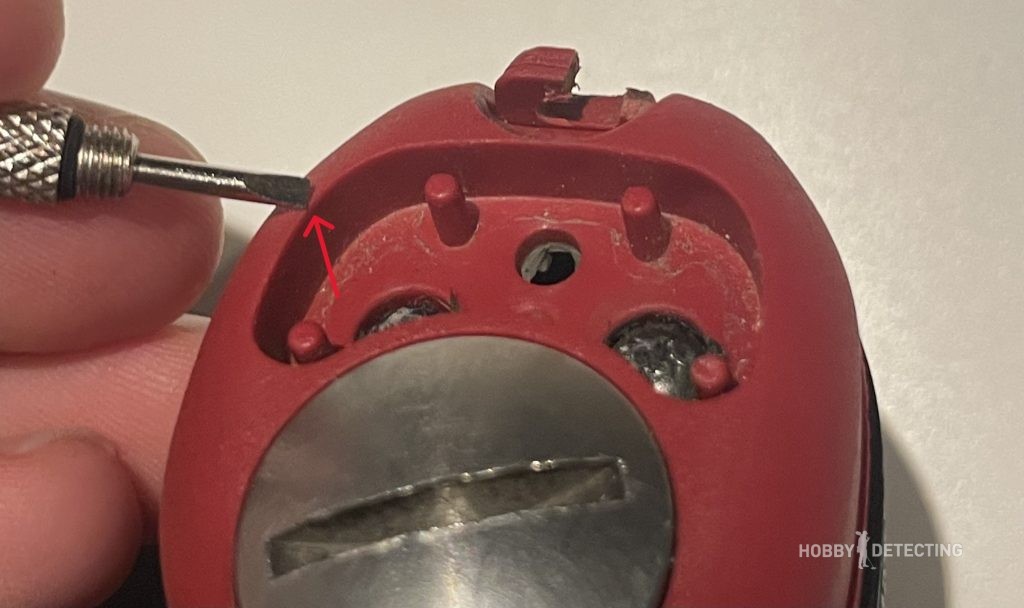
After removing this lid, continue disassembling the pinpointer by removing the two screws securing the upper casing.
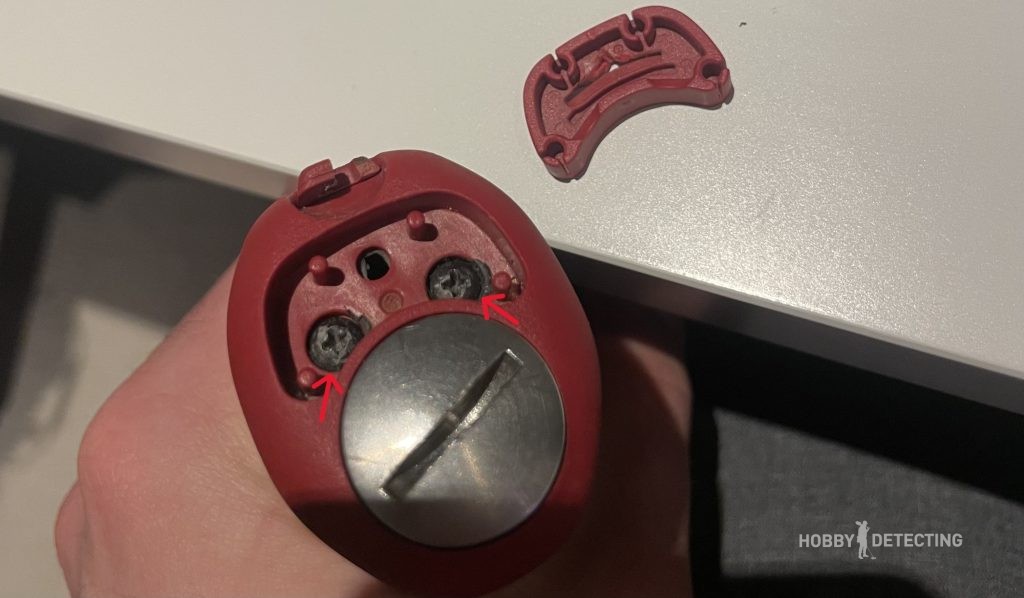
I found that the “PH0” bit fits perfectly with these first upper screws.
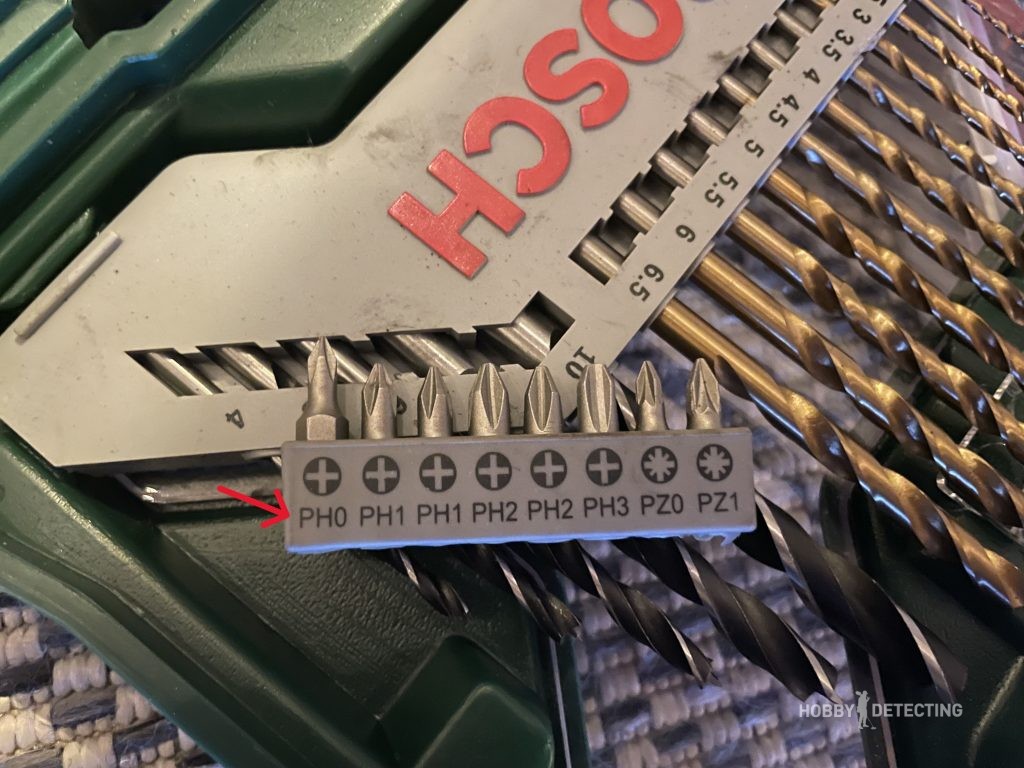
Be careful and use the correct bit/screwdriver size, so as not to round the screws!
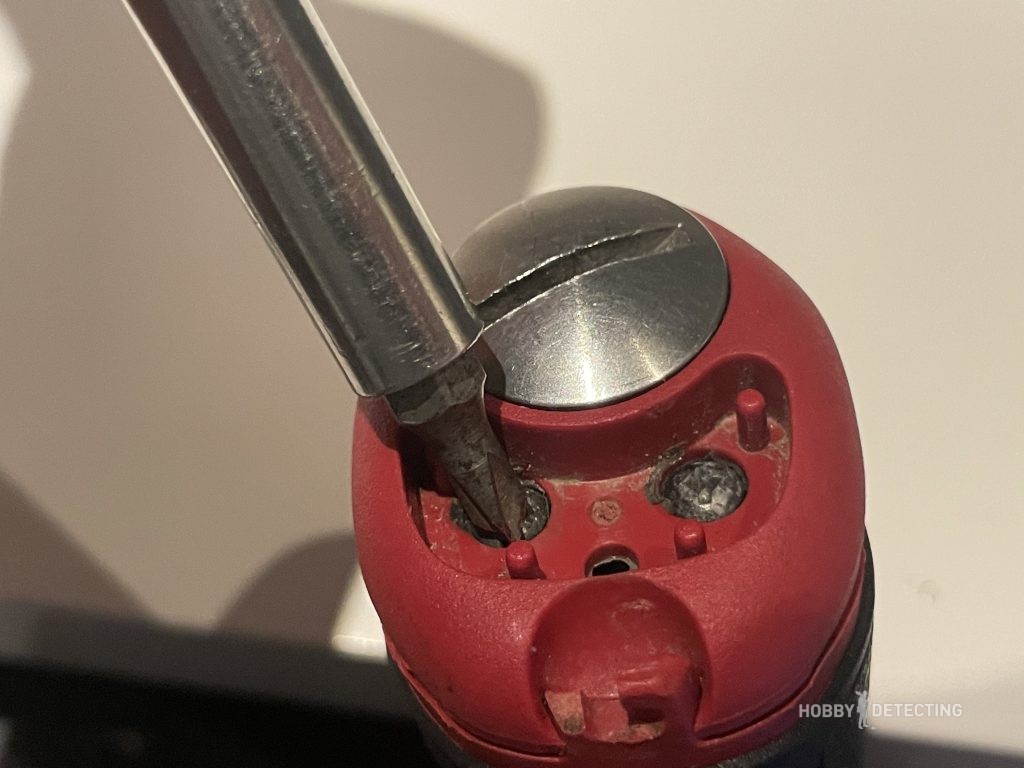
Take note of the screw placement and put them aside.
Gently pry open the upper casing, revealing the internal components. Be careful, and a tip is to jiggle it a bit side to side while pulling it apart.
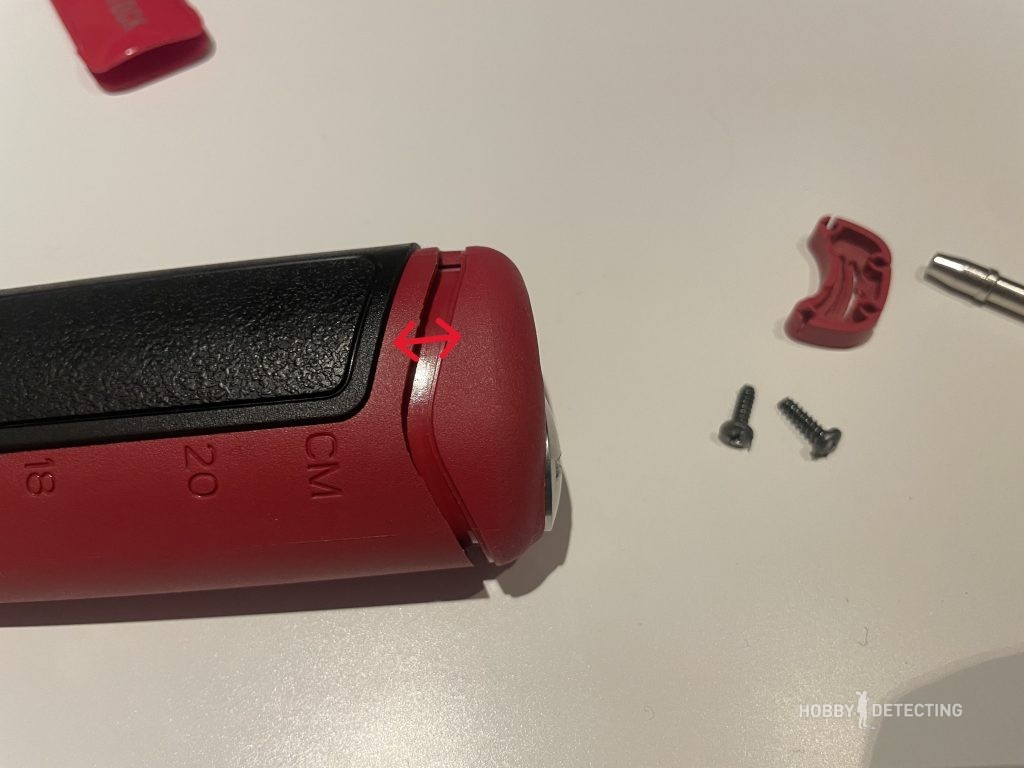
Locating the issue
Now we approach the main issue of this article. This was the problem for me, and maybe this is the issue for you as well. When the lid has been opened, pay close attention to the rear lid contact points. In many cases, the issue lies in a lack of contact between the rear cover (the minus power from the batteries) and the rest of the pinpointer.
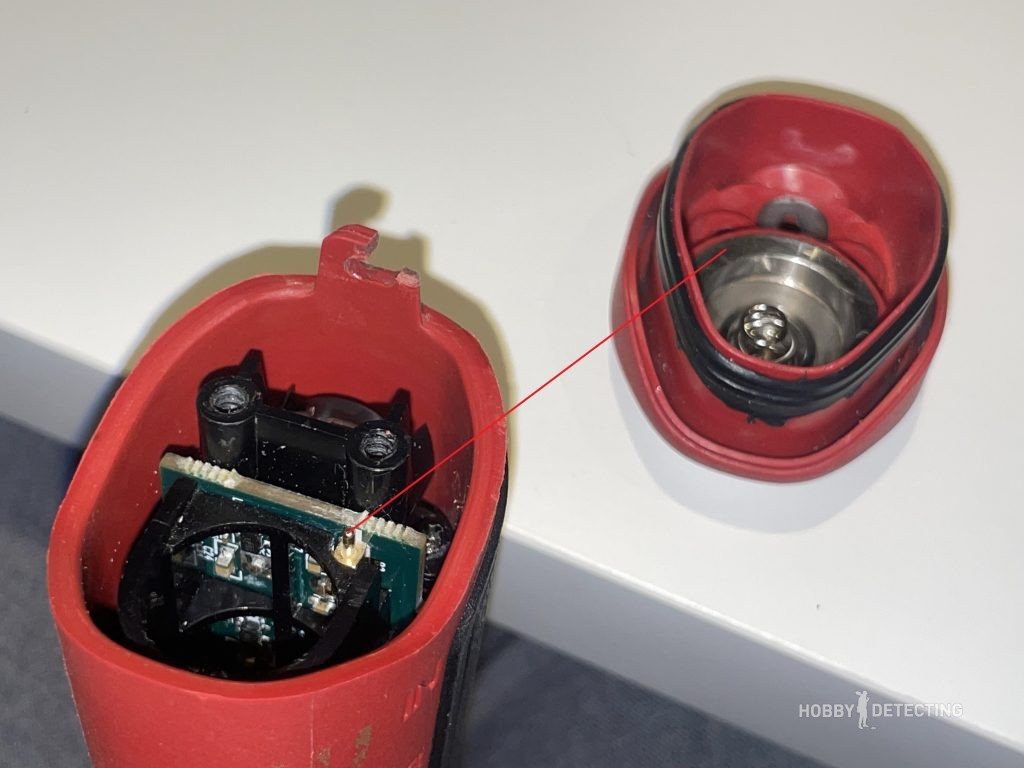
As can be seen, the rest of the pinpointer has contact with the rear lid and ultimately the minus pole on the battery via a spring-loaded pin.
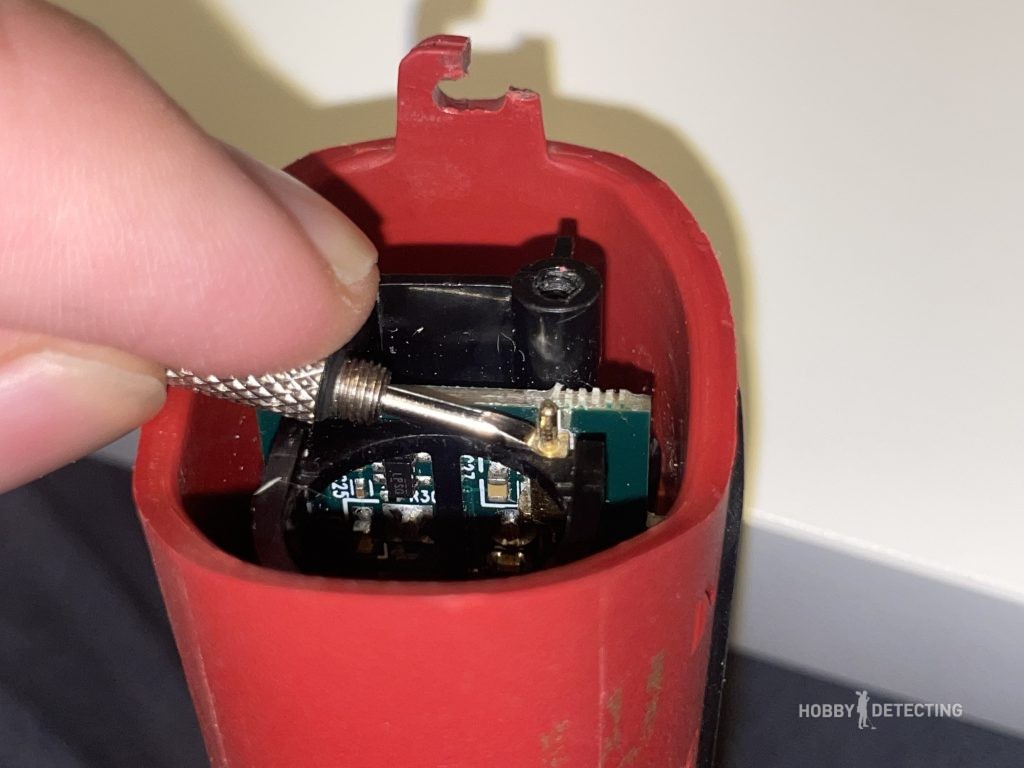
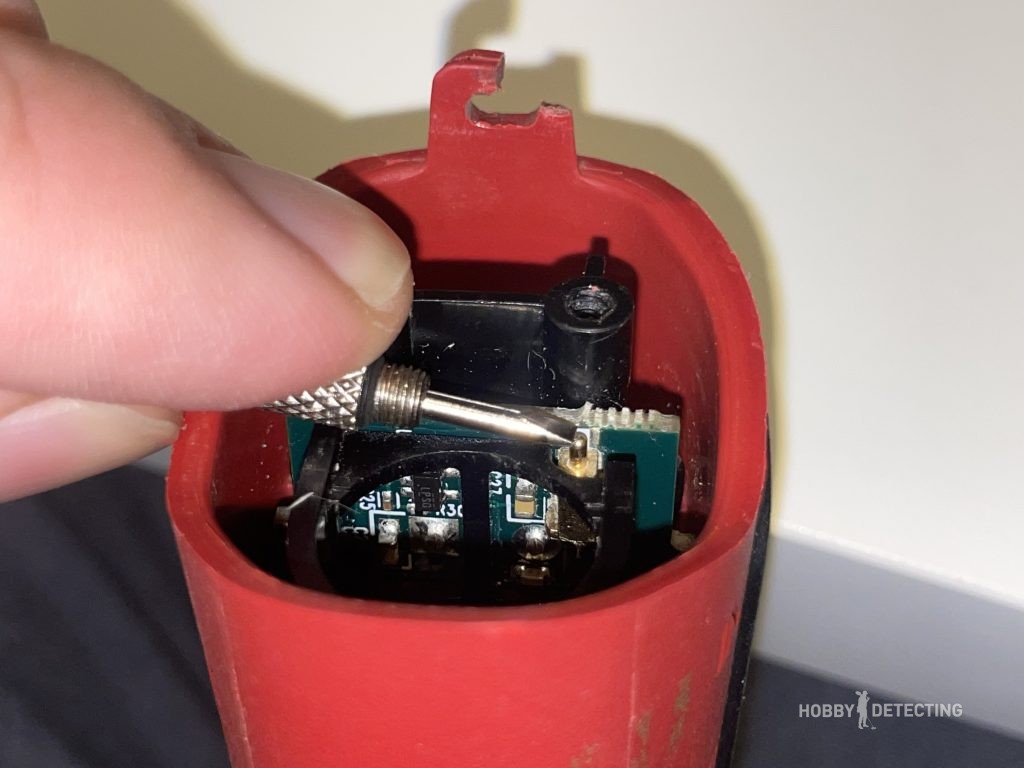
The issue on my pinpointer was that the spring-loaded pin got stuck in the lower position, and thus didn’t have contact with the minus pole on the battery! Can you imagine that such a small component was causing my pinpointer to not work at all? As can be seen, the pin is spring-loaded and initiates contact with the minus pole when the rear lid is attached to the pinpointer.
Mine was probably stuck in the lower position because of residue or water having entered the pinpointer internals! Is there really not a better design for this part?
Fixing the Contact Issue
If you observe that the pin is not making proper contact with the minus pole because it being stuck or slow, you may need to clean the pin. This can be done by using an electrical component cleaning liquid while pushing the pin up and down.
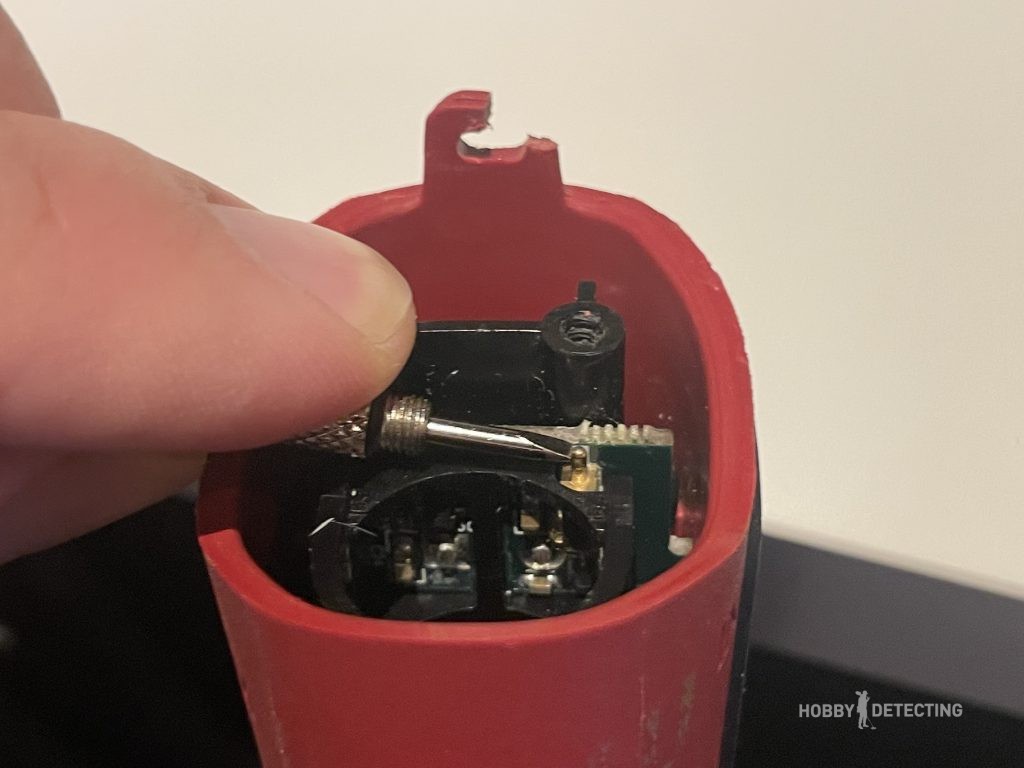
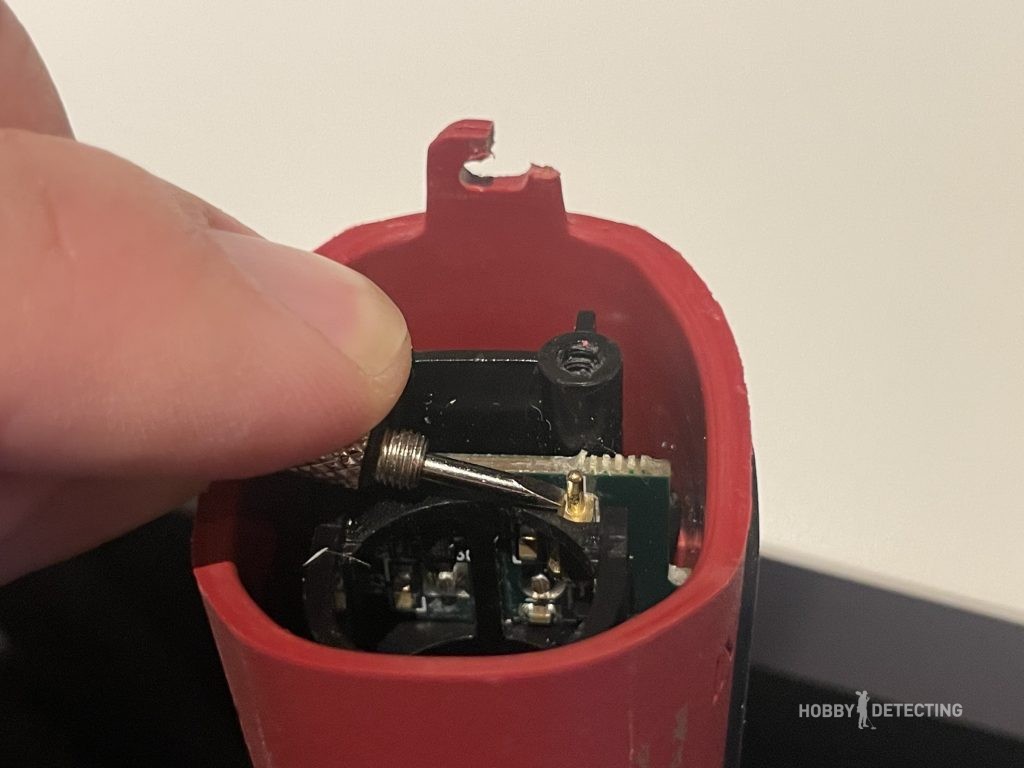
Be careful not to get the cleaning liquid on other components, and let it dry completely before assembling or inserting the batteries. My personal tip is to use a small cotton bud with the liquid on it for the best precision.
Other possible issues and further disassembly
Wasn’t this the problem with your pinpointer, or do you want to further disassemble it? Here are the instructions for that:
You have to use a small Phillips Head screwdriver to unscrew two more screws, as can be seen in the photo below.
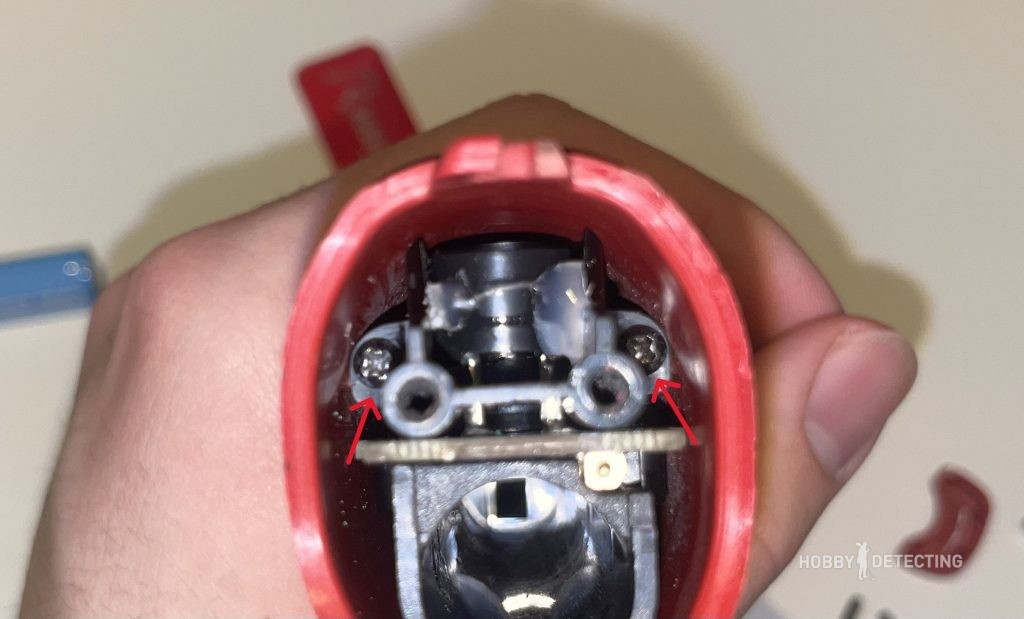
After this, you’ll be able to pull out the rest of the pinpointer assembly. But be careful when removing the flashlight diode! It needs some working around to remove from the flashlight diode housing, try by using a long pin or a screwdriver to pry it out.
After removing the internals, the multimeter comes in handy. If you know a bit about circuit boards and their components, you could at your own risk insert the batteries and hold the battery lid at the minus connecting pin, and test the board to see where the problem lies. As the problem could be anything, I really can’t give you any more instructions, but some common problems are the contact between the paths at the button and soldering or wires breaking.
Reassemble the Pinpointer
After addressing the contact issue (or whatever was faulty in your pinpointer), carefully reassemble the pinpointer in the reverse order of disassembly. Ensure all screws are tightened securely but not overly tight, as to avoid breaking the base or rounding the screws.
Test the Pinpointer
Insert fresh batteries and power up the pinpointer. Test it by scanning a metal object to confirm that the issue has been resolved.
Conclusion
Repairing your Fisher F-Pulse Pinpointer is something every owner should know to do, and it saves you the cost and inconvenience of purchasing a new one. By following the steps above, you’ve not only diagnosed and fixed a common issue but also gained valuable insights into the inner workings of your pinpointer. Happy hunting and may your next metal detecting adventure be filled with exciting discoveries!
As usual, I’ll be very happy if you leave a comment below with your thoughts or wishes for future articles, and if there are any questions do not hesitate to fire away in the comment section!





Thanks dude! Now it’s working again 🙂
But I use a bit of aluminum foil between connection.